
Home Composting Guide: Methods and Benefits
The Complete Home Composting Guide: Methods, Benefits & DIY Setup
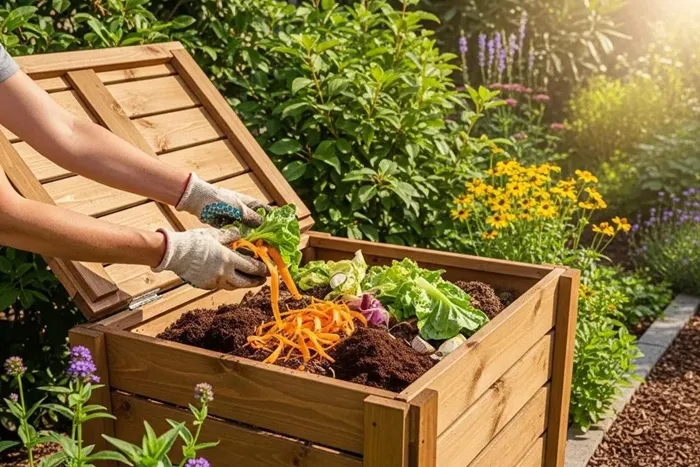
Composting at home turns your kitchen and yard scraps into nutrient-rich soil amendment and cuts the amount of organic waste sent to landfills. This all-in-one guide walks you through why composting matters, how to get started with practical methods, how to build your own DIY compost bin, and how composting helps reduce food waste. Whether you want to reduce waste, improve soil, or support local climate action, this comprehensive resource makes it easy to help the planet from your own backyard. Over time, regular composting also helps you understand seasonal waste flows and build a steady supply of organic amendment for planting and mulching.
Home composting brings clear advantages, but worldwide adoption is uneven — researchers are actively investigating the technical and awareness gaps that limit uptake.
Home Composting — Methods, Benefits & Challenges
Home composting can effectively process household organic waste, but adoption remains low in many places because of limited awareness and technical constraints. This review summarizes typical facilities, process performance, and product quality, then highlights key technical limits and possible ways to address them.
Home composting for onsite treatment of household organic solid waste: a review, W Luo, 2022
Why Composting Matters: Benefits for Your Home and the Planet
Composting at home delivers garden benefits and wider environmental gains. It returns nutrients to the soil, improves soil structure, and reduces the amount of organic material entering landfills. Over time, applying finished compost increases soil organic matter, which improves water retention and supports beneficial soil organisms.
Beyond garden gains, composting helps mitigate climate change by keeping organic waste out of landfills and nourishing ecosystems that support plant and microbial life. Using compost as a top-dressing, mixing it into planting holes, or making simple compost teas are practical ways to return those nutrients to your garden beds and containers.
Food waste is a major contributor to landfill volume worldwide. When food scraps decompose anaerobically in landfills, they produce methane — a potent greenhouse gas with a global warming potential many times that of carbon dioxide. Composting food waste at home diverts these materials from landfills, significantly reducing methane emissions and turning waste into a valuable resource.
Research shows that a large share of household food waste still ends up in landfills, but composting programs and home composting can divert a substantial portion. By composting your kitchen scraps, you help close the loop on food waste, reduce your carbon footprint, and support a circular organic economy.
Composting’s Environmental Impact: Reducing Landfill Methane
Composting food and garden waste produces much less methane than sending that material to landfill, yet a large share of organic waste still ends up in landfills. This study looks at how local curbside organics collection affects household landfill disposal and emissions. Using near-random adoption of curbside collection across councils in Australia, the authors find curbside organics programs diverted about one-fourth of household waste from landfill to composting. Their results suggest municipal organics collection could cut landfill emissions by roughly 6–26%.
If You Build It, Will They Compost? The Effects of Municipal Composting Services on Household Waste Disposal and Landfill Emissions: L. De Silva,
RLC Taylor, RLC Taylor, 2024
Composting for Beginners: How to Get Started in 5 Simple Steps
Starting composting at home is straightforward if you follow a few basic steps. These set up the right environment for microbes and, if used, worms to do the composting for you. Begin with a manageable container or pile size and increase capacity once you have a routine.
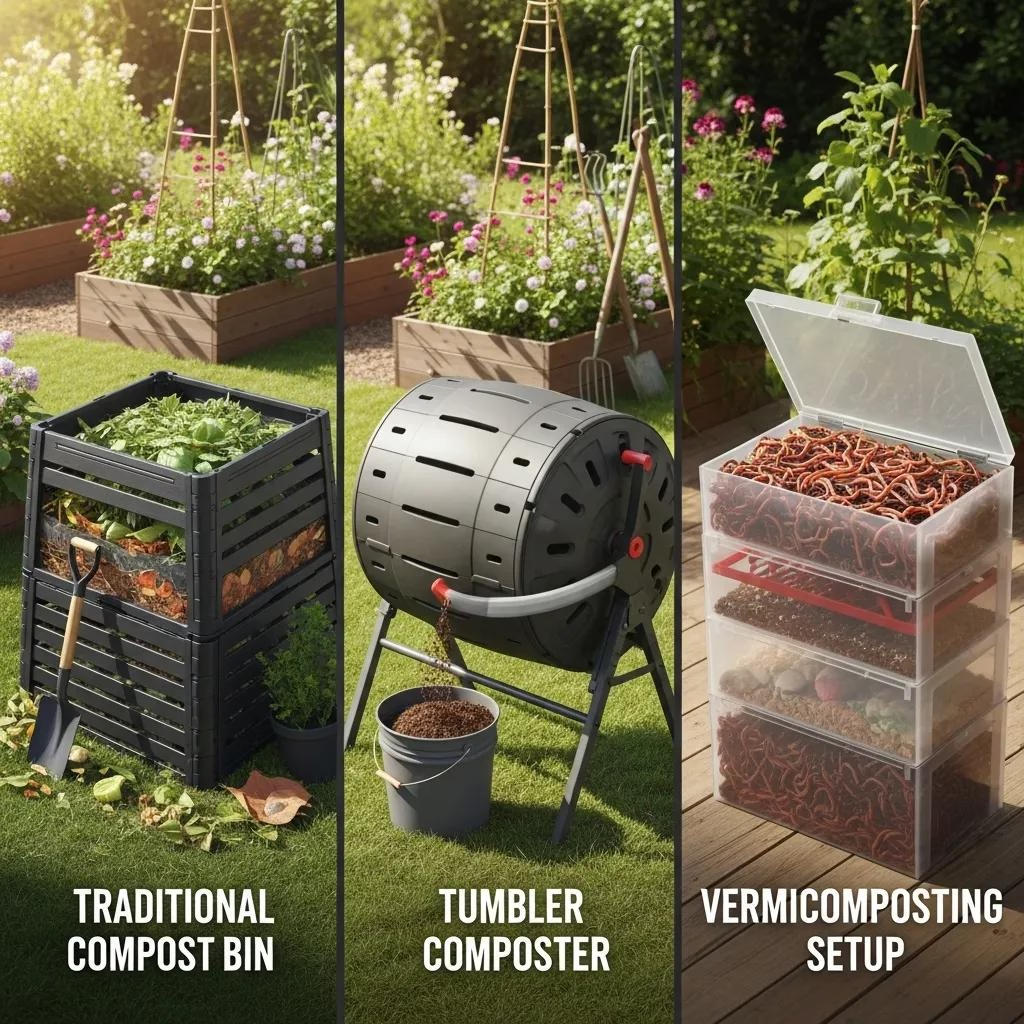
- Choose Your Composting Method: Pick a traditional bin, a tumbler, a worm system, or another method based on your space, time, and how quickly you want compost. Consider seasonal access and whether you prefer an out-of-sight system or one you will interact with often.
- Select Your Location: Choose a spot with good drainage, partial shade, and easy access. Avoid placing bins too close to your house or neighbors to minimize odors and pests.
- Gather Your Materials: Collect green (nitrogen-rich) materials like fruit and vegetable scraps, coffee grounds, and grass clippings, and brown (carbon-rich) materials like dried leaves, cardboard, and shredded paper.
- Build Your Pile and Maintain It: Start with a base of coarse material for airflow, then layer greens and browns alternately. Keep the pile moist like a damp sponge and turn it regularly to aerate and speed decomposition.
- Harvest and Use Your Finished Compost: When the compost is dark, crumbly, and earthy-smelling, it’s ready to use. Apply it to garden beds, lawns, or potted plants to enrich soil and support healthy growth.
Common Beginner Mistakes to Avoid
- Ignoring the Balance of Greens and Browns: Too many greens cause odors and soggy piles; too many browns slow decomposition.
- Overwatering or Underwatering: A pile that’s too wet smells bad and attracts pests; too dry slows microbial activity.
- Not Turning the Pile: Without aeration, composting slows and odors develop.
- Adding Inappropriate Materials: Meat, dairy, oily foods, and diseased plants can cause pests and contamination.
- Starting Too Large: Begin with a manageable size to maintain control and avoid overwhelm.
What to Compost (and What to Keep Out)
Green Materials: Nitrogen-Rich Additions
Green materials provide nitrogen essential for microbial growth. Common green materials include:
- Fruit and vegetable scraps
- Coffee grounds and filters
- Fresh grass clippings
- Eggshells (crushed)
- Tea bags (without synthetic materials)
Brown Materials: Carbon-Rich Additions
Brown materials supply carbon, which balances nitrogen and helps maintain structure and airflow. Examples include:
- Dried leaves
- Shredded cardboard and paper (non-glossy)
- Straw and hay
- Wood chips and sawdust (untreated)
- Twigs and small branches
What Never Goes in the Compost Bin
To avoid pests, odors, and contamination, keep these out of your compost:
- Meat, fish, and bones
- Dairy products and oily foods
- Pet waste
- Diseased or invasive plants
- Glossy or coated paper
- Plastic, metal, and glass
Reducing Food Waste: Valuable Kitchen Scraps and Storage Tips
Not all kitchen scraps are equally valuable for composting. Vegetable peelings, coffee grounds, and fruit scraps break down quickly and add rich nutrients. To reduce food waste and keep scraps fresh before composting:
- Use a sealed kitchen caddy or container to collect scraps daily.
- Store scraps in the refrigerator or freezer if you can’t compost immediately to prevent odors and pests.
- Chop larger scraps into smaller pieces to speed decomposition.
- Scrape plates and cooking utensils to capture all compostable residues.
Composting Methods Compared
Cold (Passive) Composting
Cold composting involves piling organic waste and letting it decompose slowly without turning. It requires minimal effort but takes longer—often 6 months to a year—to produce finished compost. This method suits gardeners with ample space and patience.
Hot (Active) Composting
Hot composting uses a balanced mix of greens and browns, moisture control, and frequent turning to generate heat that speeds decomposition. It can produce compost in as little as 3–6 weeks. Hot composting requires more attention but yields faster results and kills many weed seeds and pathogens.
Vermicomposting (Worm Bins)
Vermicomposting uses red wiggler worms to convert food scraps into nutrient-rich castings. Ideal for indoor or small-space composting, worm bins require monitoring moisture and feeding worms appropriately. The castings are excellent natural fertilizer for houseplants and gardens.
Bokashi Composting
Bokashi is a fermentation-based method using inoculated bran to pre-treat food waste, including meat and dairy, in an airtight container. After fermentation, the material is buried or added to a traditional compost pile to complete decomposition. Bokashi is compact and odorless, suitable for small spaces.
Tumbler Composting
Tumbler composters are rotating bins that make mixing materials easy and speed up decomposition. They are convenient for small yards or patios and can produce usable compost in weeks. Tumblers require balanced inputs and regular turning to maintain airflow and moisture.
Fast Composting: Tumbler Techniques for Home Waste
Tumbler composting is an efficient option for smaller spaces or anyone seeking quicker results. These sealed, rotating bins make it simple to introduce oxygen and evenly mix materials, which accelerates decomposition. Whereas a traditional pile can take 3–6 months, a well-managed tumbler may yield finished compost in as little as 3–4 weeks.
TRANSFORM YOUR KITCHEN WASTE INTO GARDEN GOLD: EASY COMPOSTING TECHNIQUES FOR LEAF LITTER, RESIDUES AND HOME GARBAGE
How to Build a DIY Compost Bin: Step-by-Step Instructions
Building your own compost bin can save money and allow you to customize the size and style to your needs. Here are three popular DIY options with materials and instructions.
Option 1: Wire Mesh Bin (Easiest)
Materials:
- Wire mesh fencing (1/2-inch or smaller grid)
- Wire cutters
- Zip ties or metal wire
- Gloves
Instructions:
- Cut the wire mesh into a rectangle approximately 3 feet wide by 3 feet tall.
- Form the mesh into a cylinder and secure the edges with zip ties or wire.
- Place the cylinder on bare soil in your chosen location.
- Leave the top open for adding materials and turning the pile.
This bin provides excellent ventilation and drainage, is easy to assemble, and is ideal for beginners with limited tools.
Option 2: Wood Pallet Bin (Most Popular)
Materials:
- Four wooden pallets (standard size)
- Hammer and nails or screws and drill
- Optional: hinges and latch for a door
- Protective gloves
Instructions:
- Arrange three pallets in a U shape to form three sides of the bin.
- Attach the fourth pallet as a removable or hinged front door for easy access.
- Secure the pallets together with nails or screws.
- Place the bin on bare soil to allow worm and microbe access.
Wood pallets are often free or low-cost and provide a sturdy, breathable bin that holds a large volume of material.
Option 3: Repurposed Plastic Bin (Smallest Footprint)
Materials:
- Large plastic storage bin with lid (at least 18 gallons)
- Drill with 1/4-inch bit
- Mesh or screen for ventilation holes
- Utility knife
Instructions:
- Drill multiple holes on the sides and bottom of the bin for ventilation and drainage.
- Cover holes with mesh or screen to keep pests out.
- Cut a flap or door in the lid or side for easy access.
- Place the bin in a shaded area and add materials in small batches.
This option is ideal for apartment dwellers or those with very limited outdoor space.
DIY vs. Purchased Bins: Cost and Effort Comparison
When building your own bin, ensure it has adequate ventilation and drainage to maintain aerobic conditions and prevent waterlogging. Size your bin to match your household waste volume—too small means frequent emptying; too large can be hard to manage.
Maintaining Your Compost: Troubleshooting Common Problems
Keeping your compost healthy requires monitoring and adjusting conditions. Here are solutions to frequent issues:
- Pile Too Wet or Too Dry: If soggy and smelly, add dry browns and turn to aerate. If dry and slow to decompose, add water and mix well.
- Bad Odors: Usually caused by anaerobic conditions or excess greens. Turn the pile, add coarse browns, and maintain moisture balance.
- Pile Not Heating Up: Check the balance of greens and browns, moisture, and pile size. Add more greens and water if dry, and ensure the pile is large enough (at least 3x3x3 feet) to retain heat.
- Pests and Rodents: Avoid meat and dairy, bury food scraps, use closed bins or secure lids, and cover fresh inputs with browns.
- Takes Too Long to Break Down: Chop materials smaller, turn more frequently, and maintain moisture and aeration.
For worm bins, if you notice mites or fungal growth, reduce feeding and allow bedding to dry slightly before resuming.
How to Use Finished Compost in Your Garden
Finished compost is dark, crumbly, and smells earthy. It should no longer resemble the original materials. To use it effectively:
- Garden Beds: Apply a 1–3 inch layer as mulch or mix into the top 6–8 inches of soil before planting.
- Lawns: Spread a thin layer (1/4 to 1/2 inch) over the grass and water in to improve soil health.
- Potted Plants: Mix compost with potting soil at a ratio of about 1:3 for nutrient-rich container media.
Compost tea is a liquid extract made by steeping compost in water. It can be used as a mild fertilizer and microbial inoculant for plants. To make compost tea, steep a handful of finished compost in a gallon of water for 24–48 hours, strain, and apply to soil or foliage.
Conclusion
Home composting is a simple, effective way to reduce food waste, enrich your soil, and support broader environmental goals. This guide has taken you through the full journey: understanding why composting matters, how to get started with beginner-friendly steps, building your own DIY compost bin, and maintaining your compost for best results. By turning everyday scraps into valuable compost, you create healthier soil and plants while making a positive local impact.
Start small, keep learning, and enjoy the benefits of composting at home. For more sustainable living tips, explore our related guides on Zero Waste Kitchen & Grocery Guide and Zero Waste Living.